Mastering 2-Ingredient PB: Roasting Peanuts for Perfect Creaminess
In a world overflowing with processed foods and lengthy ingredient lists, the simplicity of homemade two ingredient peanut butter stands out as a delicious, wholesome, and incredibly satisfying culinary feat. Forget those pricey, often sugar-laden jars from the supermarket; with just raw peanuts and a pinch of salt, you can create a spread that's superior in flavor, texture, and purity. But what's the secret to achieving that coveted, impossibly creamy consistency? The answer lies not just in your blender, but in a crucial, often underestimated step: roasting your peanuts to perfection.
Embarking on this journey to make your own homemade two ingredient peanut butter is more than just a money-saving hack; it's an opportunity to control exactly what goes into your food, eliminating unwanted additives like hydrogenated oils, excessive sugar, and stabilizers. Plus, the sheer satisfaction of transforming humble peanuts into a luscious spread is an experience every home cook should savor. Let's delve into the art and science behind crafting the ultimate creamy peanut butter, starting with its foundational element: the roast.
The Unsung Hero: Why Roasting Your Peanuts is Non-Negotiable
Many assume that buying pre-roasted peanuts is a shortcut to making homemade peanut butter. However, this is a common misconception that can severely compromise the final product. Store-bought roasted nuts often come with a medley of additional ingredients – oils, salt, flour, or even spices – that dilute the pure peanut flavor and interfere with the natural emulsification process. More importantly, they lack the fresh roast that is absolutely essential for perfect creaminess.
Roasting raw peanuts achieves several critical transformations:
- Unlocking Natural Oils: The gentle heat from roasting causes the peanuts to release their natural oils. These oils are the magic ingredient that transforms dry, crumbly peanuts into a smooth, emulsified butter. Without sufficient oil release, your peanut butter will be dry, chunky, and stubbornly refuse to become creamy.
- Deepening Flavor: Roasting enhances the inherent nutty flavor of the peanuts. The Maillard reaction occurs, creating complex, rich, and aromatic compounds that raw peanuts simply don't possess. This deep, toasty flavor is what sets truly exceptional peanut butter apart.
- Improving Texture: Roasting slightly dries out the peanuts while simultaneously releasing their oils, making them easier to process into a smooth consistency. It creates a delicate balance that allows your food processor or blender to work its magic more effectively.
- Aromatic Bliss: The aroma of freshly roasted peanuts is incomparable. This isn't just about taste; it's about a holistic sensory experience that begins even before your peanut butter is blended.
So, while it might seem like an extra step, roasting your own raw peanuts is the single most important factor in achieving that dreamy, super smooth, and flavorful homemade two ingredient peanut butter you're aiming for.
Choosing Your Peanuts Wisely: From Raw to Runner
Before you even think about roasting, selecting the right peanuts is paramount. The quality of your raw ingredients will directly impact the taste and texture of your finished spread. Here’s what to look for:
Raw, Unroasted, Unsalted is Best
Always opt for raw, unroasted, and unsalted peanuts. This gives you complete control over the roasting process and ensures no unwanted additives find their way into your butter. Avoid peanuts that have been seasoned, oiled, or otherwise tampered with.
To Peel or Not to Peel?
Raw peanuts typically come with a thin, papery skin. You have two main options:
- Blanched Peanuts: These are raw peanuts that have already had their skins removed. Purchasing blanched peanuts significantly speeds up the preparation process and reduces mess. They are a fantastic choice for convenience and yield an exceptionally smooth peanut butter.
- Peanuts with Skin On: If you buy peanuts with the skin, you'll need to remove it after roasting (though some prefer to leave a little on for a more rustic, fiber-rich spread). While it adds a small amount of time, the effort is minimal, and the taste is identical.
Understanding Peanut Varieties
There are four primary varieties of peanuts, each with slightly different characteristics:
- Runner: This is the most popular variety for commercial peanut butter due to its uniform kernel size and high yield. Runner peanuts have a balanced oil content that makes them ideal for a creamy spread. They are often the traditional choice for homemade two ingredient peanut butter.
- Virginia: Larger in size, often used for snacking or in-shell roasting. They can work for peanut butter but might produce a slightly different texture.
- Spanish: Known for their smaller, round kernels and higher oil content, Spanish peanuts can create a very rich and flavorful butter.
- Valencia: Typically have three or more kernels per pod and are very sweet. Often used for all-natural peanut butter and often grown organically.
While Runner peanuts are a safe and excellent choice, feel free to experiment with other varieties if available to discover your personal preference. The key is always to start with raw, unroasted nuts.
Your Step-by-Step Guide to Silky Smooth Homemade Two Ingredient Peanut Butter
With your ideal peanuts in hand, it’s time to transform them into glorious peanut butter. This process is surprisingly simple, yet incredibly rewarding.
Step 1: Prepare and Roast the Peanuts
- Preheat Oven: Preheat your oven to 325ºF (165ºC).
- Spread Evenly: Arrange your raw peanuts in a single layer on a baking sheet. Avoid overcrowding, as this can lead to uneven roasting.
- Roast: Place the tray in the preheated oven and roast for 7-10 minutes. Keep a close eye on them, as peanuts can go from perfectly toasted to burnt very quickly. You'll know they're ready when they become fragrant, turn a light golden-brown color, and possibly show a few cracks in their skins.
- Cool Completely: Remove the peanuts from the oven and let them cool down completely on the baking sheet. This step is crucial. Cooling allows the oils to settle and the peanuts to firm up slightly, making them easier to handle and blend. Trying to peel or blend hot peanuts can be messy and less effective.
Expert Tip: If you're unsure, it's better to under-roast slightly than over-roast. You can always give them another minute or two, but you can't undo a burnt batch!
Step 2: Remove the Skin (Optional, but Recommended for Smoothness)
If you used blanched peanuts, you can skip this step. For peanuts with skin, once they are cool enough to handle, removing the skins will result in a much smoother, more refined peanut butter.
- Simple Method: Place the cooled peanuts in a clean kitchen towel. Gather the corners of the towel to form a pouch and gently rub and scrunch the peanuts together. The skins will loosen and fall off with surprising ease.
- Collect: Separate the peeled peanuts from the loose skins. Don't worry if a few stubborn bits of skin remain; a little extra fiber won't hurt!
Step 3: The Blending Ballet
This is where the magic truly happens, transforming solid nuts into a creamy spread. You'll need a powerful food processor or a high-speed blender for best results.
- Add Peanuts and Salt: Place the cooled, roasted (and peeled, if desired) peanuts into the bowl of your food processor or blender. Start with a pinch of salt – you can always add more later. A good starting point is about 1/4 to 1/2 teaspoon per 2 cups of peanuts.
- Process: Begin processing the peanuts. The journey from whole peanuts to smooth butter typically goes through several stages:
- Crumbs: Initially, the peanuts will break down into coarse crumbs.
- Fine Meal: The crumbs will become finer, resembling peanut flour.
- Sticky Ball: As the oils begin to release, the mixture will start to clump together, forming a sticky, thick ball that rolls around the bowl.
- Thick Paste: Eventually, the ball will break down into a very thick, pasty consistency.
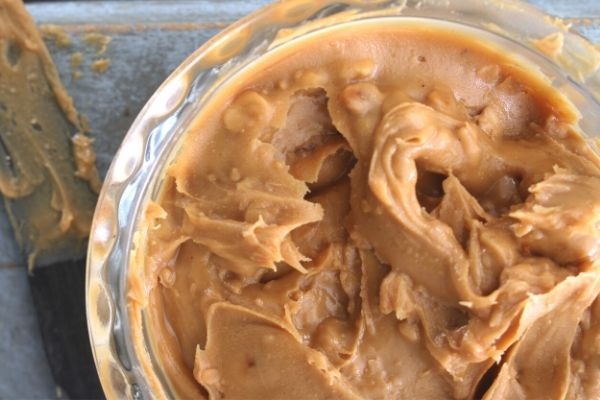
- Creamy Butter: Keep blending! Patience is key. The paste will gradually transform into a shiny, smooth, and pourable peanut butter. The longer you blend, the runnier and smoother your peanut butter will become.
- Scrape and Rest: During the blending process, especially in the earlier stages, you'll need to periodically stop the machine and scrape down the sides of the bowl to ensure even processing. If your machine starts to heat up, give it a 1-2 minute break to prevent overheating.
- Adjust Consistency (Optional): If your peanut butter seems too thick even after prolonged blending, you can add a tiny drizzle of a neutral oil (like grapeseed or peanut oil) to help it along, but often, simply blending longer is sufficient.
- Taste and Adjust: Once you reach your desired consistency, taste your homemade two ingredient peanut butter and add more salt if needed.
This entire blending process can take anywhere from 5 to 15 minutes, depending on the power of your machine and the quantity of peanuts. Don't be discouraged if it takes a while; that's perfectly normal.
Beyond the Jar: Creative Ways to Use Your Homemade PB
Once you've tasted the fresh, pure flavor of your homemade creation, you'll find countless ways to enjoy it. Of course, the classic PB&J sandwich is always a winner. But why stop there?
- Baking Marvel: Your homemade peanut butter is the star ingredient for incredibly simple and delicious treats. Think about those timeless 2-ingredient peanut butter cookies that require only peanut butter and powdered sugar for a quick, nostalgic dessert.
- Smoothie Boost: Add a dollop to your morning smoothie for a protein-packed, creamy texture.
- Savory Sauces: Use it as a base for satay sauce, salad dressings, or even in stir-fries for a rich, nutty flavor.
- Fruit & Veggie Dip: Pair it with apple slices, banana, or celery for a healthy and satisfying snack.
Troubleshooting & Tips for Homemade Peanut Butter Success
- Not Getting Creamy?
- Patience is Key: You might not be blending long enough. Keep going! It will eventually get there.
- Insufficient Roast: The peanuts might not have released enough oil. Ensure they are fragrant and lightly golden after roasting.
- Too Few Peanuts: If you're making a very small batch, some food processors or blenders might struggle to get enough friction to create a smooth butter. Try using at least 2-3 cups of peanuts.
- Storage: Store your homemade peanut butter in an airtight container in the refrigerator. It will last for several weeks. Because it lacks stabilizers, separation of oil is natural; simply give it a good stir before each use.
- Customization: Feel free to experiment! A drizzle of honey or maple syrup can add sweetness. A dash of cinnamon, vanilla extract, or even a sprinkle of cocoa powder can create delightful variations. Just remember that adding liquids or other ingredients might slightly alter the texture and shelf life.
Making homemade two ingredient peanut butter is a rewarding experience that puts you in control of your pantry staples. By embracing the crucial step of roasting your own raw peanuts, you unlock a depth of flavor and a velvety smoothness that store-bought varieties simply can't match. It's a testament to the power of simple, high-quality ingredients and a little patience in the kitchen. So go ahead, grab some raw peanuts, fire up your oven, and prepare to be amazed by the incredible deliciousness you can create with just two ingredients.
